Not Acceptable! An appropriate representation of the requested resource could not be found on this server. This error was generated by Mod_Security [SOLVED]

Working on programming for so many years, it amazes me that i have really much to learn. This recent issue cropped up out of nowhere.

I decided to disable mod security , which is a bad idea honestly. But true enough, i found the culprit. It seems when you pass a get parameter with special characters, our websites seem to be on high alert against hack attack

<IfModule mod_security.c>
  SecFilterEngine Off
  SecFilterScanPOST Off
</IfModule>

What i was passing is the name of a client through get command. Yeah i know . It came out as link.php?name=M&M

I changed then parameter to a session id i had given before and it solved the issue. sigh. another lesson learned.

Coffee Cup

ClipboxTab , SmoothSearch , Dexpredict , FreeCounterStat [FIXED]

Recently one of the websites i was handling started to show strange. When you load the main page, and click with any link or part of the website, it redirects to another page outside of the website.

At first i was puzzled what was causing it. I thought the website has been infultrated or hacked. But it seems everything is still intact.

I separated the main page and tried to dismantle it from there. And you know, what i was the cause, it was a php counter that i got into the website. It seems to be in sleep mode until around 3 years later.

Here are some of the links when you get redirected

https://dexpredict.com/jump/next.php?r=3001031
https://www.smoothsearch.online/install?pubid=2777&productid=30551&clickid=US168345805110000TPHTV422920713914V18
https://clipboxtab.com/install?pubid=2777&productid=30570

Now i know you are dying to know the source. And here it is

https://www.freecounterstat.com

The website gives out a link that you embed in your website

<div id="sfcybjc22f3ctd27lelnzssl4fl8422sw7h"></div>
<script type="text/javascript" src="https://counter10.optistats.ovh/private/counter.js?c=ybjc22f3ctd27lelnzssl4fl8422sw7h&down=async" async></script>
<noscript>
<a href="https://www.freecounterstat.com" title="free hit counter">
<img src="https://counter10.optistats.ovh/private/freecounterstat.php?c=ybjc22f3ctd27lelnzssl4fl8422sw7h" border="0" title="free hit counter" alt="free hit counter">
</a>
</noscript>

The culprit is the first line of the code

<div id="sfcybjc22f3ctd27lelnzssl4fl8422sw7h"></div>

So that’s it. Hope somebody don’t need to learn it the hard way. It’s better you create your own page counter. Either using php & mysql or a txt file to store the current value.

Coffee Cup

#1005 – Can’t create table ‘xxxxxx’ (errno: 150) [SOLVED]

If you are using xampp and you encounter this message during creation of a table, i have found that a lot of them pertain to the unit used to reference the field. If the master table used INT (11), when you reference it as a foreign key, you also need to use the same unit INT(11) as well.

In my case it was different. You see, i got this message because the table I used as a foreign key is the table ‘item’ whereas originally it was table ‘item_list’.

So just in case you encounter this one and still have problems, it might be the table name.

Learn and move forward

Coffee Cup

PHP Reload Page After 10 Seconds

Here is my take on the question, how to refresh the page after 10 seconds

Enjoy

Coffee Cup

<script type="text/javascript">

  var timeout = setTimeout("location.reload(true);",10000);
  function resetTimeout() {
    clearTimeout(timeout);
    timeout = setTimeout("location.reload(true);",10000);
  }
  
</script>  

PHP Code for FB Plugin

Here is the code I used in integrating the fb plugin using iframe into the website.

Please replace the fields that require your actual account.

I also included an html tag .

Enjoy,

Coffee Cup

https://developers.facebook.com/docs/plugins/like-button


JavaScript SDK


Step 1: Include the JavaScript SDK on your page once, ideally right after the opening body tag.
<div id="fb-root"></div>
<script async defer crossorigin="anonymous" src="https://connect.facebook.net/en_US/sdk.js#xfbml=1&version=v14.0" nonce="F1YcA0n6"></script>
Step 2: Place this code wherever you want the plugin to appear on your page.
<div class="fb-like" data-href="https://www.facebook.com/PoshMotorcycleShop" data-width="200" data-layout="standard" data-action="like" data-size="small" data-share="true"></div>


IFrame

<iframe src="https://www.facebook.com/plugins/like.php?href=https%3A%2F%2Fwww.facebook.com%2FPoshMotorcycleShop&width=200&layout=standard&action=like&size=small&share=true&height=35&appId" width="200" height="35" style="border:none;overflow:hidden" scrolling="no" frameborder="0" allowfullscreen="true" allow="autoplay; clipboard-write; encrypted-media; picture-in-picture; web-share"></iframe>


For Android the URL schema is:

fb://page/page_id
For iOS the URL schema is:

fb://page?id=page_id


https://developers.facebook.com/docs/plugins/like-button

<html>
<head>
  <title>Your Website Title</title>
    <!-- You can use open graph tags to customize link previews.
    Learn more: https://developers.facebook.com/docs/sharing/webmasters -->
  <meta property="og:url"           content="https://www.your-domain.com/your-page.html" />
  <meta property="og:type"          content="website" />
  <meta property="og:title"         content="Your Website Title" />
  <meta property="og:description"   content="Your description" />
  <meta property="og:image"         content="https://www.your-domain.com/path/image.jpg" />
</head>
<body>

  <!-- Load Facebook SDK for JavaScript -->
  <div id="fb-root"></div>
  <script async defer crossorigin="anonymous" 
        src="https://connect.facebook.net/en_US/sdk.js#xfbml=1
             &version={graph-api-version}
             &appId={your-facebook-app-id}
             &autoLogAppEvents=1" 
        nonce="FOKrbAYI">
  </script>

  <!-- Your like button code -->
  <div class="fb-like" 
       data-href="https://www.your-domain.com/your-page.html" 
       data-width=""
       data-layout="standard" 
       data-action="like" 
       data-size="small"  
       data-share="true">
  </div>

</body>
</html>

PHP Date Format

A common mistake that i always do is to forget the strtotime field

Here is where i usually use it.

Enjoy

Coffee Cup


***************************************************

	//20221117
	if ($pldate != '')
	{
		$pldate = date("m/d/Y", strtotime($pldate));
	}
	
	if ($plcheck_date != '')
	{
		$plcheck_date = date("m/d/Y", strtotime($plcheck_date));	
	}
				
?>	
        <div id="page-wrapper">

***************************************************

$pltype = $_POST['pltype'];
$pltype = htmlspecialchars( $pltype, ENT_QUOTES);

	//20160904
	if ($pldate != '')
	{
		$pldate = date("Y-m-d", strtotime($pldate));
	}
	
	if ($plcheck_date != '')
	{
		$plcheck_date = date("Y-m-d", strtotime($plcheck_date));	
		$plcheck_date2 = date("Y-m-d", strtotime($plcheck_date));	
	}
	else
	{
		$plcheck_date2 = NULL;	
	}

***************************************************


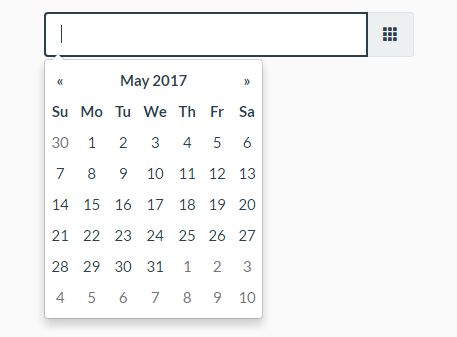
Bootstrap Website showing Date Picker using PHP

Configurable-Date-Picker-Plugin-For-Bootstrap

Using angular, a few of the requests were to make the date into a date picker. I have found the code and wanted to share it here

Enjoy,

Coffee Cup

<script   src="https://code.jquery.com/jquery-2.2.3.min.js"   integrity="sha256-a23g1Nt4dtEYOj7bR+vTu7+T8VP13humZFBJNIYoEJo="   crossorigin="anonymous"></script>
<link href="https://maxcdn.bootstrapcdn.com/bootstrap/3.3.6/css/bootstrap.min.css" rel="stylesheet" integrity="sha384-1q8mTJOASx8j1Au+a5WDVnPi2lkFfwwEAa8hDDdjZlpLegxhjVME1fgjWPGmkzs7" crossorigin="anonymous">
<script src="https://maxcdn.bootstrapcdn.com/bootstrap/3.3.6/js/bootstrap.min.js" integrity="sha384-0mSbJDEHialfmuBBQP6A4Qrprq5OVfW37PRR3j5ELqxss1yVqOtnepnHVP9aJ7xS" crossorigin="anonymous"></script>
<script type="text/javascript" src="https://cdnjs.cloudflare.com/ajax/libs/bootstrap-datepicker/1.6.0/js/bootstrap-datepicker.min.js"></script>
<link rel="stylesheet" type="text/css" href="https://cdnjs.cloudflare.com/ajax/libs/bootstrap-datepicker/1.6.1/css/bootstrap-datepicker3.min.css">

<script>
$( document ).ready(function() {
    $("#from-datepicker").datepicker({ 
        format: 'yyyy-mm-dd'
    });
    $("#from-datepicker").on("change", function () {
        var fromdate = $(this).val();
        alert(fromdate);
    });
}); 
</script>

	<div class="form-group">
		<label>Date</label>
		<input type="text" id="from-datepicker"/>
	</div>

Contact Us – How to send email with attachment in PHP

Send Email Attachment

I have done a lot of contact us page in websites before and this one, i had to add email attachments as well. The secret to it was to upload it to your website before you can send it as an email attachment.

Recently I found a great website that does that.

Hope it helps somebody out there

Coffee Cup

<?php 
 
// Recipient 
$to = '[email protected]'; 
 
// Sender 
$from = '[email protected]'; 
$fromName = 'CodexWorld'; 
 
// Email subject 
$subject = 'PHP Email with Attachment by CodexWorld';  
 
// Attachment file 
$file = "files/codexworld.pdf"; 
 
// Email body content 
$htmlContent = ' 
    <h3>PHP Email with Attachment by CodexWorld</h3> 
    <p>This email is sent from the PHP script with attachment.</p> 
'; 
 
// Header for sender info 
$headers = "From: $fromName"." <".$from.">"; 
 
// Boundary  
$semi_rand = md5(time());  
$mime_boundary = "==Multipart_Boundary_x{$semi_rand}x";  
 
// Headers for attachment  
$headers .= "\nMIME-Version: 1.0\n" . "Content-Type: multipart/mixed;\n" . " boundary=\"{$mime_boundary}\""; 
 
// Multipart boundary  
$message = "--{$mime_boundary}\n" . "Content-Type: text/html; charset=\"UTF-8\"\n" . 
"Content-Transfer-Encoding: 7bit\n\n" . $htmlContent . "\n\n";  
 
// Preparing attachment 
if(!empty($file) > 0){ 
    if(is_file($file)){ 
        $message .= "--{$mime_boundary}\n"; 
        $fp =    @fopen($file,"rb"); 
        $data =  @fread($fp,filesize($file)); 
 
        @fclose($fp); 
        $data = chunk_split(base64_encode($data)); 
        $message .= "Content-Type: application/octet-stream; name=\"".basename($file)."\"\n" .  
        "Content-Description: ".basename($file)."\n" . 
        "Content-Disposition: attachment;\n" . " filename=\"".basename($file)."\"; size=".filesize($file).";\n" .  
        "Content-Transfer-Encoding: base64\n\n" . $data . "\n\n"; 
    } 
} 
$message .= "--{$mime_boundary}--"; 
$returnpath = "-f" . $from; 
 
// Send email 
$mail = @mail($to, $subject, $message, $headers, $returnpath);  
 
// Email sending status 
echo $mail?"<h1>Email Sent Successfully!</h1>":"<h1>Email sending failed.</h1>"; 
 
?>

PHPMailer – SMTP error password command failed

phpmailer smtp gmail

Hey guys, i have been experimenting with smtp and gmail for sending to clients using php. Found this wonderful article and thought of saving it here on my blog as a keepsafe. Unfortunately, bobcares does like his blogs to be posted anywhere else. Such a shame.

Anyways, hope you enjoyed the research. It helped me through mine.

Leave some comments blow.

Coffee Cup

phpmailer-smtp-error-password-command-failed

Stuck with PHPMailer – SMTP error password command failed? We can help you.

We may come across this error when we try to send mail using phpmailer().

SMTP ERROR: Password command failed: 534-5.7.14

As part of our Server Management Services, we assist our customers with several SMTP queries.

Today, let us see how to fix this error.

PHPMailer – SMTP error password command failed

This error may occur due to the below reasons:

  • When a less secure application tries to use the email account.
  • If we try to log in several times a row
  • If we change countries (For example, use VPN, move code to a different server, or actually try to login from a different part of the world).

Moving ahead, let us see the methods our Support Techs employ in order to fix this.

Solution 1: In the case of the Windows server

PHP.ini

  1. Initially, we go to C:\xampp\php, edit the php.ini file with notepad.
  2. Under the [mail munction] section, we remove the semicolon for this line:sendmail_path = “\”C:\xampp\sendmail\sendmail.exe\” -t”
  3. Then we add a semicolon for this line:sendmail_path=”C:\xampp\mailtodisk\mailtodisk.exe”

SendMail.ini

  1. Here, we go to C:\xampp\sendmail, edit the sendmail.ini file with notepad
  2. Then we change the following:smtp_server=smtp.gmail.com smtp_port=465 [email protected] auth_password=your-gmail-password [email protected]

smtp_port should tally with what is written in our php code.

Solution 2: Enable less secure applications (SMTP server is Gmail)

  1. Initially, we login to the account via web
  2. Then we view recent attempts to use the account and accept suspicious access:
    https://security.google.com/settings/security/activity?hl=en&pli=1
  3. We can disable the feature of blocking suspicious apps/technologies:
    https://www.google.com/settings/u/1/security/lesssecureapps

Solution 3: (SMTP server is Gmail)

  1. Initially, login to the account via web
  2. Access the URL: https://accounts.google.com/b/0/DisplayUnlockCaptcha
  3. Then we click the continue option
  4. We can check whether phpmailer is set as SMTP with SSL.

This will work if our SMTP server is Gmail.

Solution 4: Change SMTPSecure value from SSL to TLS in phpmailer() code.

Solution 5: In the case of Gsuite

In such a case, we have to solve it as the Administrator.

  1. Go to Admin panel >> Security with Shield icon >> Basic settings
  2. Then go to the Less secure apps section
  3. Now we select one of the Radio Button:

a) Disable access to less secure apps for all users (Recommended)
b) Allow users to manage their access to less secure apps
c) Enforce access to less secure apps for all users (Not Recommended)

Generally, if option a) does not work, it will start to work with the c) option.

Solution 6: In the case of cPanel/WHM servers

This is related to a security feature in WHM/cPanel.

  1. Firstly, log in to CPanel
  2. Navigate to Tweak Settings > All > “Restrict outgoing SMTP to root, Exim, and mailman
  3. Eventually, switch it from “On” to “Off”.

In addition, we can do this via SSH as well:

/scripts/smtpmailgidonly off

PHP tip : how to remove columns and save to another file

Hello guys,

Had a special request to trim the csv fields in the file.

After searching, found a code to satisfy the request.

Posted the URL from the original link

Enjoy,

Coffee Cup

http://stackoverflow.com/questions/8608970/writing-to-csv-using-fgetcsv

$input = 'input.txt';
$output = 'output.txt';

if (false !== ($ih = fopen($input, 'r'))) {
    $oh = fopen($output, 'w');

    while (false !== ($data = fgetcsv($ih))) {
        // this is where you build your new row
        $outputData = array($data[0], $data[1], $data[4], $data[5], $data[6]);
        fputcsv($oh, $outputData);
    }

    fclose($ih);
    fclose($oh);
}