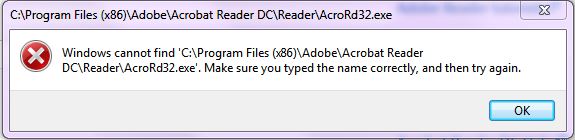
Hyper Threading to Single Thread

If you are looking for a software that will bridge your delphi application and your interbase application that is freeware, look no further. I found this program while researching since i cannot install delphi during deployment because it needs a serial key. Now, you don’t need to.

Here are the links. Please try only one. They all link to the same file. But just in case one of the links fail, at least you have other options to reach them.

http://www.indishare.me/79wawf5nnord

http://verified-download.com/file/36L9866

https://uploadocean.com/4r1mzjqiz7fw

https://dailyuploads.net/8uksbvfx4apm

https://www.megaupload.us/1NlH/20180218_Interbase_Hyper_Threading_to_SIngle_Thread.7z

http://agileurbia.com/CVW


Interbase Server 6.01 IBServer601

If you are looking for a software that will bridge your delphi application and your interbase application that is freeware, look no further. I found this program while researching since i cannot install delphi during deployment because it needs a serial key. Now, you don’t need to.

Here are the links. Please try only one. They all link to the same file. But just in case one of the links fail, at least you have other options to reach them.

http://www.indishare.me/crwiuhtl4orc

http://reliablefiles.com/file/36L9867

https://uploadocean.com/4gc6yik3rkk3

https://dailyuploads.net/xiusw41u9hs2

https://www.megaupload.us/1NlI/20180218_Interbase_Server_6.01_IBServer601.7z

http://agileurbia.com/CX4


Interbase : IB Client Freeware

If you are looking for a software that will bridge your delphi application and your interbase application that is freeware, look no further. I found this IB client program while researching since i cannot install delphi during deployment because it needs a serial key. Now, you don’t need to.

Here are the links. Please try only one. They all link to the same file. But just in case one of the links fail, at least you have other options to reach them.

http://www.indishare.me/r56pgf38bysj

http://filerack.net/file/36L9865

https://uploadocean.com/04pdw1dr0nxw

https://dailyuploads.net/h38drei09qth

https://www.megaupload.us/1NlG/20180218_Interbase_Client_IB.7z

http://agileurbia.com/CUh


Delphi : Borland Database Engine (BDE) Freeware

If you are looking for a software that will bridge your delphi application and your interbase application that is freeware, look no further. I found this program while researching since i cannot install delphi during deployment because it needs a serial key. Now, you don’t need to.

Here are the links. Please try only one. They all link to the same file. But just in case one of the links fail, at least you have other options to reach them.

http://www.indishare.me/9eoytymglcyf

http://downloadity.net/file/36L9864

https://uploadocean.com/be2vntyuw74j

https://dailyuploads.net/ywnlecobuaeq

https://www.megaupload.us/1NlF/20180218_Borland_Database_Engine_BDE.7z

http://agileurbia.com/CQH


Delphi : Parse or Explode a string based on a parameter field

this is a small code that i put together to convert the date time format of “2017-11-18 08:25” to the date time format that i am using right now which is “11/18/2017 8:25:00 AM”.  For now i will make due with this one and so far it works.

enjoy,

coffee cup


var
vDATE : TDateTime;
vPOS : Integer;
vList : TStrings;
begin
//convert from 2017-11-18 08:25
//convert to 11/18/2017 8:25:00 AM

vPOS := POS(‘ ‘, edtDATE_ORIG.Text);

edtDATE_CHOP.Text := Trim(Copy(edtDATE_ORIG.Text,1, vPOS));
edtTIME_CHOP.Text := Trim(Copy(edtDATE_ORIG.Text,vPOS + 1, 100));

vList := TStringList.Create;
try
ExtractStrings([‘-‘], [], PChar(edtDATE_CHOP.Text), vList);

edtYEAR.Text := vList.Strings[0];
edtMONTH.Text := vList.Strings[1];
edtDAY.Text := vList.Strings[2];

//year, month, day
edtDATE_CURR.Text := edtMONTH.Text + ‘/’ + edtDAY.Text + ‘/’ + edtYEAR.Text;
vDATE := StrToDateTime(edtDATE_CURR.Text + ‘ ‘ + edtTIME_CHOP.Text);
edtDATETIME.Text := DateTimeToStr(vDATE);

finally
vList.Free;
end;

Windows 7 : How to access the advanced boot options on your laptop

If you are a windows pc user for quite some time, accessing the Windows 7 to see the Advanced Boot Options can be a challenge if you are using different laptop brands. Here are the list of shortcut key combinations

Enjoy

Coffee Cup


Acer – Alt + F10

Asus – F9

Dell/Alienware – F8

HP – F11

Lenovo – F11

MSI – F3

Samsung – F4

Sony – F10

Toshiba – 0 (not numpad) while turning on, release key when Toshiba logo appears


Windows : How to restart or shutdown your computer in command line or DOS mode

I know what you’re thinking, how come you need to know this thing if there is a shutdown or restart button.  Well, extra wisdom is better than nothing. I had a case where the shutdown and restart button is missing. My first guess is that the pc has been infected with a virus.

But just in case you encounter this scenario and you have the run command, you can type the following line

To shut down your computer, type: shutdown /s

To restart your compute,r type: shutdown /r

To log off your computer, type: shutdown /l

For a complete list of options, type: shutdown /?

After typing your chosen option, press Enter. The computer will execute your desired task.

How to add or remove password in MS Excel 2007

Had to chance up on encountering this problem again. Fortunately, you need to follow these steps in order to add or remove passwords in MS Excel 2007.

I have made a youtube video to show both the short version and the long version on how to achieve this.

For the short version here are the steps

Open Microsoft Excel 2017 workbook
Open the file to add or remove the password
Click the ORB logo on the top left
Click the ‘Save As’ button
Click the ‘Tools’ button and then click ‘General Options‘ tab
In the ‘Password to open’ box, add or delete the existing password then click ‘OK’.
Click the ‘Save’ button. If prompted, click ‘Yes’ to replace the existing workbook

Enjoy

Coffee Cup

Windows Server 2012 R2 Socket Network Error

Today is a new day. Mark and I installed a new windows server 2012 r2 and have also installed the drivers and software. We started using the Server Guide downloaded from the Lenovo Website and then the Operating System.

After installing, i loaded my app and hoped that it would run smoothly as always. But no, it did not push through as expected. I assigned the server with an ip address of #15. I use the DOS prompt ping and the ipaddress replied. I tried to look at the My Computer and typing the server name, and you can see the shared folders.

This is the whole message…
“EXCEPTION EBDE ENGINE ERROR IN MODULE XXX.EXE AT 00096F36. UNKNOWN DATABASE. UNABLE TO COMPLETE NETWORK REQUEST TO HOST ERVER_NAME? FAILED TO ESTABLISH A CONNECTION. A SOCKET OPERATION WAS ATTEMPTED TO A GENERAL SQL ERROR. UNREACHEABLE NETWORK ALIAS”

The error kept mentioning socket connection that was not successfuly. So what i did changed the ip address again. Lo and behold, i was able to run my app. Usually in normal windows pc the system should let you know if you have an ip address conflict. In this case, the server did not show that little dialog box.

It has been a very educational experience with conflicting ip address that in the windows server does not show you. Please note that the ip address belonged to a belkin device and not a PC or laptop. Maybe that could be the cause.

I tried to replicate the scenario in my Windows 7 pc and my pc reacted with a small message dialog of IP CONFLICT.

I have created a youtube video to show my adventure

Happy watching

Coffee Cup

S.O.P. Before Formatting a Windows Computer

As a programmer for some years already, I have seen my shares of people asking me to format their Windows PC.  And true enough, a lot of people in the IT world sometimes skip steps that I feel that I need to share to you guys in order not to suffer the horror of missing files and folders.

Many of my steps are pretty straight forward. And as the saying goes, an ounce of prevention is better than a pound of cure. I will also include scenarios that you may encounter along the way.

Step 1 – Prepare the Backup Hardware

Start first by preparing a large external drive or USB thumb drive beforehand. It would probably be a good idea if it would be empty and without your personal data so that just in case d files are infected with a virus or malware, your files are pretty safe.

Case Scenario: If you can still open the computer and you can still login, that is well and good for you. But just in case the windows operating system is corrupted or the user forgot their password, what you can do is you can install a windows operating system on top of the existing one to get the files. Just make sure not to erase and you want to keep the existing windows operating system.  Windows usually renames the old one as WINDOWS_OLD folder and Program Files to Program Files (OLD), I think. This step is a little tedious since you will be redoing the formatting again later to have a clean slate. But this step is surely worth the time.

Step 2 – Create Folders In Your External Drive

To me, I am a bit of an organization freak for files and folder. What I usually do is I start with the folders: Drive C, Drive D, Desktop, Documents, Pictures, Music and Videos. Once you have these folders you can start moving the files.

Bonus Tip: You may wonder why you want to move the file instead of copy. The reason for the move is so that just in case the operations get cut, you get to continue where you left off. Instead of guessing what folder you stopped on. Anyway, you get to format the whole drive so no need to leave the file in the hard drive.

For the Drive C and Drive D files, you get to see IT tech created folders like like util for utilities, or mboard for motherboard which is pretty important if you will format the computer. For me personally, I create folders like Software and Drivers to house all of the freeware software that I install. The reason in doing this is so that if a brother or sister or coworker needs the software that I installed, I just ask them to copy the software from the unit I just reformatted.

Step 3 – Use the Search or Find Window

Before we use the find option in windows to look for common files that we might have missed after our first sweep, please go to the Windows Explorer and open the hidden files and folders options. This tip is pretty useful if your pc is already infected with a virus as they always hide them from users.

Once you are done, try look for doc (MS Word), xls (MS Excel), pdf (Acrobat Reader), zip files. The most common file that we all have are jpg or jpeg picture files, not to mention the avi, mpeg or mp4 movie files.

Big tip no. 1: If the user is an architect, you might need to google file extensions for Autocad files. If your friend is an artist you might need to look for Adobe Photoshop or Corel Draw files.

Big tip no. 2: It is still best to ask what files he or she commonly uses especially if the user is a student. Sometimes they need file extensions needed for their school projects like Visual Studio files or Maya.

Step 4 – Backup the System Settings

In this step, we will be going to 4 settings in the Control Panel of the computer.  Before I usually open up Microsoft Paint press the print-screen on the keyboard to save each one per file. That was in the golden age when I haven’t even got my own mobile phone. These days, I use my phone’s camera to get a snapshot which is one of the wonders of modern technology.

  • Device Manger – To access this, you need to click the Devices The Device Manager tells you all of the drivers are located to make your computer works. If you did not find any driver installers on your computer, chances are, this is your best bet to know what the computer needs.
  • System Information – To access this, you need to go to click the System This page will tell you the computer name, and also the version of windows the user is running.
  • Software Installed – To access this, you need to go to click the Programs and Features. This page lists down all of the software the user uses. It is good to inform the user of the software that he needs to reinstall by himself. It’s not always guaranteed that what software he has you could bring back again. An example of these are game software (e.g. in my time, Red Alert, Warcraft and Star Craft) and specialized (e.g. software like Autocad and Adobe Suite that might require serial keys)
  • Network Settings – To access this, you need to click the Network and Sharing Center, then Change Adapter Settings. This step is needed if the computer you will try to format belongs to a computer or if it is for a school. Since both institutions sometimes configures devices like laptop to access their network using IP address and Default Gateways. This will take you to the individual LAN and WIFI adapter the computer has. You need to copy the IP address, Subnet Mask and Default Gateway if they are present. If both settings are set to Obtained IP Address Automatically, no need to do anything for this step.

Well, that’s it for me. After following these steps, you should be able to proceed with formatting the computer with a clear conscience that your friend or office mates would not be crying by your side for lost and unrecoverable files.